The Glam-Goth Look Make-up Tutorial

By Allison, CN Supplies Coordinator & Natural Makeup Enthusiast

I hope you enjoyed our first makeup blog last month. This time, we have a more bold look for you and we got creative with how we use the products - multi-functional, if you will!

(Disclaimer: I am an enthusiast, not an expert!)

  • Apply a primer (or moisturizer) to clean skin

  • While the primer/moisturizer absorbs, apply concealer to eyelids and set it with a setting powder.

  • Fill brows with brow pencil.

    • I filled my brows using medium pressure strokes of the Jane Iredale Precision Pencil in Soft Black, making sure to give structure to the edges of the brow and fill in gaps within.

    • If you end up with something too dark, comb through brows using a spoolie brush or run a cotton swab over the dark parts.

  • Give brows hold by combing through with a brow gel.

  • Use an angle brush, water, and eyeshadow to create a winged liner effect on the upper lid and lash line.

    • I used the Jane Iredale Blue Hour Palette. I dipped my angle brush in water; then into the medium shade (a sparkly midnight blue). Then, I dragged the brush across my upper lash line and lid to create a wing. I always use an eye makeup remover and cotton swab to clean up any imperfections. 

    • Note for beginners: start about halfway across your eyelid, pressing the brush along your upper lash line, dragging it to the outer corner of your eye. Then, re-product the brush and start dragging from the outer corner of your eye - at an angle - toward the end of your eyebrow. Drag out as far as you prefer, and then bring the shadow back to meet your lash line. Repeat until desired shape and opaqueness is achieved. 

  • Use the same angle brush, water, and eyeshadow to line the bottom lash line.

    • I again used the Jane Iredale Blue Hour Palette - angle brush → water → midnight blue shadow. Starting at the outer corner, I applied the shadow to the lower lash line, making sure to connect it to the base of the wing at the outer corner. I only brought the shadow/liner to about halfway across my lower lash line - this is mostly preference because I like to leave the inner surfaces for lighter colors.

    • Follow up with a concealer along the edges to create a crisper and brighter transition or smoke out the edges using a clean fluffy eyeshadow brush.

  • Apply a lighter colored eyeshadow. 

    • I used Fat and the Moon Highlighter in Beam. I applied it to my eyelid, from the inner corner to the wing, using my finger. I also applied it slightly above my natural crease. I chose the midnight blue and lit because they capture a frosty wintery vibe. The Fat and the Moon highlighters are both face and eye-safe, so they are a versatile product for your collection. 

    • You could definitely use the lightest shade from the Blue Hour Palette. It’s a beautiful shade of shimmery lavender - it just didn’t look super flattering on my skin tone. 

  • Apply Mascara

  • Clean up eyeshadow fallout using makeup remover

    • I used Sweet Almond Oil on a cotton swab to wipe away any particles that had fallen on my cheeks. I followed that with a little micellar water to remove the oily residue. You need to clean the oily residue because it will prevent the concealer from holding on to the skin when it is applied. 

  • Apply concealer.

    • I again used the Ere Perez Pot concealer in Latte. Using my finger, I tapped the concealer under my eyes, on the edges of my nostrils, and along my chin because those are the places where I need coverage. Then, I used a damp beauty sponge to press and blend the concealer into my skin.

    • Apply the concealer wherever you feel you need more coverage. 

    • For fuller coverage, apply and blend one coat; let it dry down; then apply and blend another coat. 

  • Apply foundation.

    • I used the Jane Iredale PurePressed Foundation Powder in Warm Sienna

    • Using a fluffy powder brush, I applied the foundation all over my face, making sure to get substantial coverage to the places where you applied concealer. I, then, used a very damp beauty sponge and pressed the powder into my skin - this helps the minerals in the foundation blend into the skin, resulting in more coverage with a natural finish.

    • If you have setting spray, feel free to mist that over your face and then press the powder into your skin using a damp sponge. 

  • Apply bronzer. 

    • I used the Jane Iredale Bronzer in So-Bronze 2. I applied it under my cheekbones and along the bottom side of my jawline. Admittedly, I used this powder as a contour (which is traditionally cool toned), despite it being a little on the warmer side. 

    • The main logic here is that darker shades, regardless of their tone, bring areas back in space and lighter shades act to bring areas forward in space. 

    • Any cool toned shade of the jane iredale powder would work as well - you just want it to be a few shades darker than your skin tone.

  • Apply highlighter to cheekbones. 

    • Again, I used Fat and the Moon Highlighter in Beam to highlight the upper half of my cheekbones.

    • This will bring the area forward in space while also creating a glowy, shimmery cast that catches the light!

  • Line the lips and blot the excess. Stay with me here; it’s going to look odd for a minute!

    • I went in with the Ere Perez Jojoba Eye Pencil in Agate starting with an outline of the lips and subsequently filling in the whole lip with the liner. Next, I used a tissue to very gently blot the excess.

    • Note: generally speaking, products that are eye-safe are also safe to use on lips and face.

  • Apply the eyeshadow to lips. Yes, I said that!

    • I took the medium shade from the Blue Hour Palette and applied it to my lips using a dense eyeshadow brush.

    • Now, this will not work with every liner shadow combination, but it works with most of Ere Perez pencils because they are so moist from the jojoba oil. 

 There you have it folks, a wintery slightly goth makeup look!

On Appreciating Urban Wildlife

By Amber, Supplements Buyer + Strolling Enthusiast

I am, as an adult, quite contentedly a city person. But I wasn't always. I grew up in a distinctly more rural area, where deer regularly came into the yard and foxes watched me from the hills. I had always possessed a love for nature, but when I moved to Boston for work, I at first felt disconnected. Where was the natural world amidst all this pavement? As it turns out, it's still there: you just have to look a bit closer. 

I walk nearly three miles to work each way, which gives me a lot of time to observe nature. I find it a meditative experience: I set aside a little extra time to examine interesting plants and animals I see, sometimes taking pictures or making sketches of them to help me identify them later. Being mindful of my surroundings serves as both a grounding exercise and an intellectual one, as I pause to focus on the natural world around me. Here are some ways I've found to connect with nature when you live in the city.

Get to know your local wildlife. The neighborhood I live in is colloquially known as Rat City, but there's far more than just rats. Cities play host to a diverse collection of fauna, and I've greatly enjoyed getting to know them. Some of them are nuisances, like the wild turkeys who stop traffic along Mass Ave in Cambridge, or the starlings who reduced my vegetable seedlings to bare earth in a matter of days, or the coyotes who lope along the Charles in the early morning hours. Others are thoroughly charming, like the flock of semi-tame pigeons that eat peanuts out of my hands and the fat cottontail rabbits nibbling clover behind my local library. My attention to the local wildlife has acquainted me with species like the common grackle (a heavy-beaked blackbird), the slate junco (a chubby, almost spherical sparrow that I'm particularly fond of), and the cedar waxwing (a fruit-loving bird with some truly impressive feathers). Paying attention to the animals you see every day is a great way to connect yourself back to nature in the city. 

...and your local plants. Despite the often harsh New England climate, a variety of plant life thrives here. Some species I've found on my wanderings include the Cornelian cherry, with its olive-like red fruits; the fragrant linden whose blossoms make such calming tea; and the Ailanthus tree, an invasive species whose scent is as foul as the linden's is pleasant. 

Change your viewpoint. I mean this in a literal sense, not a metaphorical one. Spend some time looking at the ground, at the undergrowth. Are there mushrooms poking up from the roots of that oak tree? Does that fur-lined tunnel in the ground look like the nest of an Eastern Cottontail? Examine last season's fallen leaves and plant detritus, slowly decomposing into dark, nourishing humus. The ground is so much more alive than you might think. Look up into the trees. Fall and winter is a great time to spot old bird nests in the crowns of trees. Is that a beehive? Crabapples withering on the branches, the tiny cones of Eastern Hemlock. Starlings nesting in the eaves of the apartment buildings. Crows perched on television antenna, ivy winding around telephone poles. Both the sky and ground host tiny wonders. 

Find the untamed spaces... Even amidst the cultivated lawns and pruned trees of what sometimes seems like endless college campuses, wild spaces exist. In disused construction sites, on the fringes of winter playgrounds, beside railways and drainage ditches, wildlife emerges. Some plants, like great mullein and broadleaf plantain even prefer disturbed landscapes and poor soil -- I'll never forget the time I found a mullein plant growing on the roof of Cambridge Naturals' Brighton location! 

...and appreciate the cultivated ones. I live not far from Aeronaut's beer garden in Allston, and upon walking past it one summer day was tickled to see they'd planted grapevines and hops along one wall. On the campus of the Harvard Business School, spiky-flowered witch hazel blooms in midwinter, its pompoms often dusted with snow. These landscaping choices may be deliberate, but getting to know them has a magic all its own. 

It took me a number of years to understand and appreciate the wildlife of the city I live in, but I feel genuinely grateful for having taken the time to learn about it. Even the most urban spaces hold tiny pockets of nature -- if only you're patient enough to find them. 

Five Easy Ways to Reduce Your Waste in 2024

By Amber, Supplements Buyer & Zero-Waste Enthusiast

"The world doesn't need five people doing low-waste perfectly. It needs five thousand people doing low-waste imperfectly."

I find myself thinking of this quote often. As someone who is trying to reduce the amount of waste I generate, it can sometimes feel very intimidating to explore the low-waste lifestyle. Since I live in a third-floor apartment that's roughly the size of a postage stamp, things like composting and growing my own vegetables aren't feasible for me. But I truly believe that it's the intent that counts with waste reduction, and that even the smallest actions are important. Here are a few simple ways I've found to help reduce the waste in my life. 

Try Some Mending. So your favorite sweatshirt finally ripped under the arm; or a button popped off your jacket, or your cat clawed a hole in the upholstery of your couch. Learning how to repair a busted seam or replace a button is a simple skill that you'll be able to put to use again and again, and if you feel confident, you can even try some more complicated projects. (I taught myself how to reupholster dining chairs this year, and in doing so saved some previously-very-ugly chairs from the landfill with a colorful fabric makeover.) 

Put the 'Eco' in Decor. Instead of purchasing new decorations for the holidays, see what you can repurpose around your house. Last year I decorated my Christmas Tree with strips of recycled fabric instead of tinsel -- it was colorful, unique, and utterly whimsical. I also like to make garlands out of newspaper and bright paint for holidays, and I am a big fan of papier-mache. Making your own holiday (or birthday, or random party) decorations can also be a great opportunity to bond with friends and family -- especially if you have kids in your life!

Rethink Your Packaging. Considering your plastic waste is a great way to reduce how much trash you generate. A few years ago, I went through my day writing down everything I used that was made of plastic, and was horrified to see how long the list was. Sustainability has swept the body care industry, and many products -- like deodorant packaged in paperboard, shampoo bars without any plastic packaging, and even plastic-free cosmetics -- are available nowadays. Even a switch from a plastic container to a glass one can help. 

Green Your Period. If you're a person who menstruates, you know how much trash period products can generate. I've been using a menstrual cup for over 10 years now, and it's been one of the easiest adjustments to the low-waste lifestyle I've ever found. (Bonus: no more purse full of maxi pads, taking your bag to the bathroom, or hiding tampons in your boot to discreetly tend to your menstrual needs while you're out and about.) My favorite reusable period products are the DivaCup and Gladrags Reusable Pantyliners

Go for Reusable. While some aspects of low-waste can seem intimidating and even downright scary (reusable toilet paper, anyone?), others are pretty accessible. Switch out your plastic sandwich bags for a cute reusable fabric pouch, try a roll of reusable bamboo paper towels instead of your regular kitchen paper towels, and carry a water bottle instead of buying plastic bottles of water. These days, whenever I buy something, I ask myself, Will I be able to use any part of this object again? I repurpose glass jars and bottles to hold my spices and teas, wrap leftovers in Bees Wrap, and opt for reusable face-cleansing pads. All in all, these adjustments to my life have been pretty easy!  

Remember, we're all on this low-waste journey together. Don't be too hard on yourself if you see the girl on Instagram buying all her groceries in bulk when you've only recently switched to paper-wrapped soap. We each do what we're capable of. And no effort goes unacknowledged. Every act of waste reduction, no matter how small, can make a difference. 

Closing CN Boston Landing

Dear customers,

It is with great sadness that we share the news with you that we will be closing our Boston Landing location in early January. 

We opened our second location in the summer of 2018, just when the neighborhood was beginning to come alive with small businesses, new buildings and new office tenants, and was humming with potential. 

Over the course of our five and a half years in business in Boston Landing, we have weathered multiple storms - including the literal rain storm that nearly destroyed our point-of-sale system the day before we opened (!), and most significantly, the pandemic - which has of course had a devastating impact on most brick-and-mortar businesses located in office-heavy neighborhoods. As a family-owned business with no outside investors, we’ve tried nearly every scrappy business and marketing idea in the book to help our nascent second location survive and thrive. Unfortunately, this has been one very long storm we haven’t been able to weather!

We are so proud of everything our Cambridge Naturals - Boston Landing team has accomplished over these years, and incredibly grateful for the truly wonderful community of customers who have made it clear how much they love that location, as well as for our landlord, who has made significant and meaningful efforts to champion the independent businesses in the neighborhood. We are excited to see how the BL community of businesses continues to grow and evolve! We have learned so much, and made some strong connections with friends across the river that will hopefully carry on long into the future. 

When we moved from Mass Ave in Cambridge to Porter Square in 2006, we used the tagline, “Help us lighten the load before we move up the road!” So now we’re saying, “Help us reduce our inventory to a sliver before we carry it across the river!” (You can blame my father and CN’s co-founder Michael for the terrible sense of humor.) We will be placing all of our products at CN Boston Landing on sale starting today - Save 30% Off everything in store*! Everything remaining will be transferred over to Cambridge Naturals - Porter Square. 

Our current plan is to be open to customers through Friday January 5th, but that may change depending on our in-stock levels (we may close a day or two early) so please call the store before you come over and/or check our website for details.

When the dust settles, we are looking forward to regrouping and turning our full team’s attention to Cambridge Naturals in Porter Square, with significant hope and inspiration. Thank you to all our customers for cheering us on through these wild times. We’re so grateful to be a part of your community, whether near or far. 

Emily & Caleb and the CN Team

*applies only to items currently in stock at Cambridge Naturals - Boston Landing (Brighton). Does not apply to online orders placed for pick-up. While supplies last. 

Fortune Favors the Bowl... of Black Eyed Peas

By Dev, CN Manager

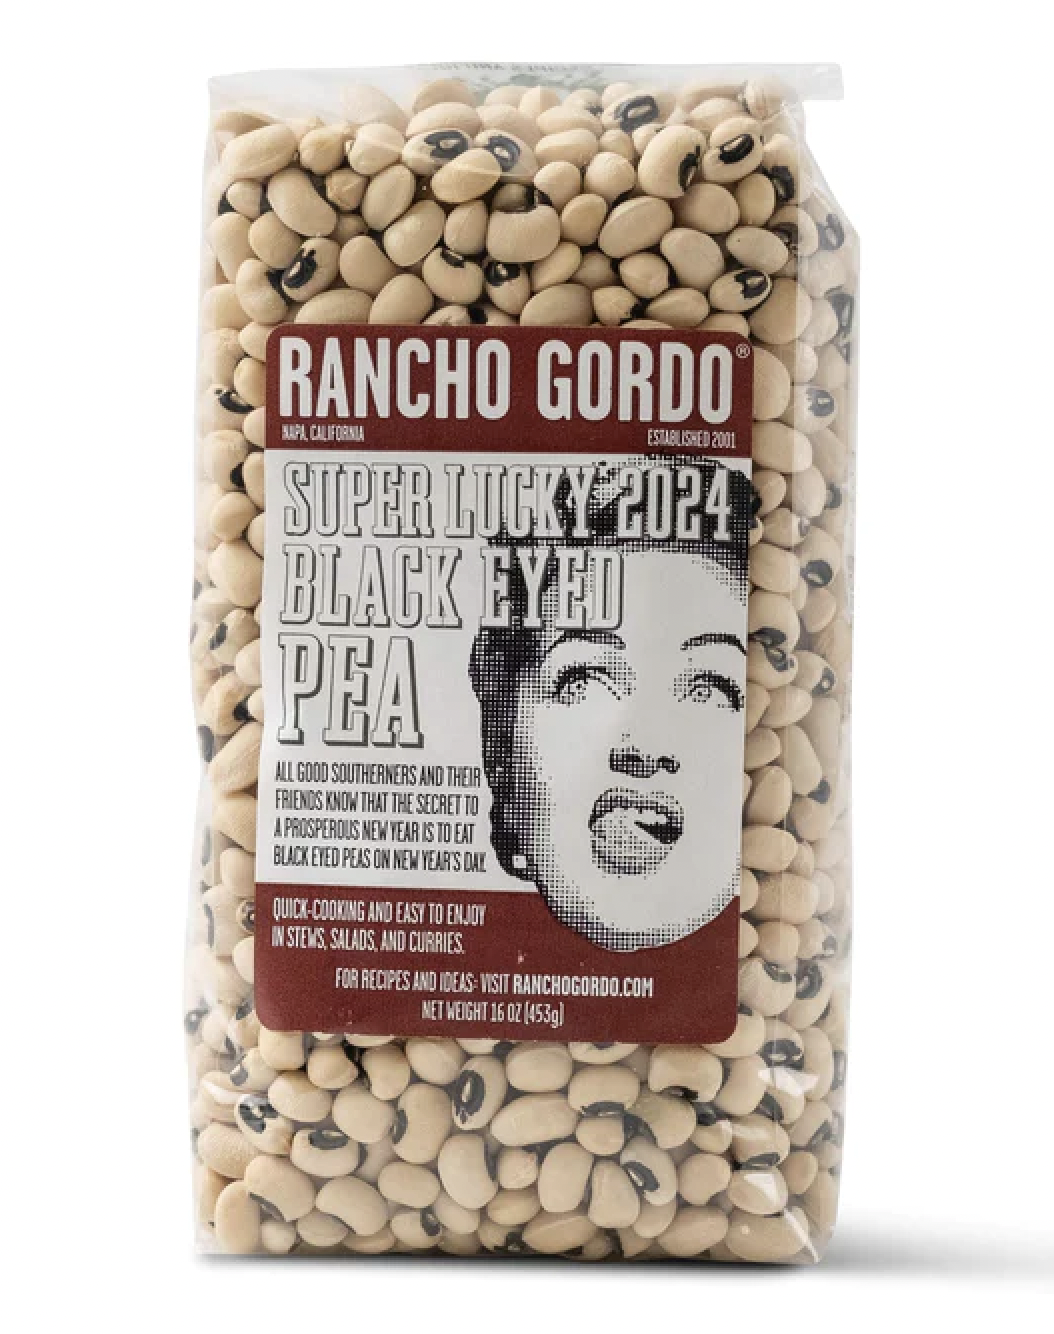
Good luck in 2024 is on the side of Cambridge Naturals customers, because we're fortuitous enough to stock special heirloom dried black eyed peas from Rancho Gordo! Their Super Lucky 2024 Black Eyed Peas are going to be making their way onto many plates this January 1st--including mine, and hopefully yours, too. I can't wait to integrate them into one of my favorite yearly rituals, one that I've somehow managed to not miss once in over 30 years. 

There's an interesting, mysterious history behind the old tradition of eating black eyed peas on New Year's Day in the southern United States. It's one I've also carried with me from my home in the South to my newer home in New England, and I've been blessed with numerous opportunities to share it with my friends in Beantown, as well. 

(Fun fact: these little peas aren't peas at all - they're beans from the cowpea family.) 

There have always been a diverse array of theories surrounding the genesis of this southern and African American cultural staple. It seems generally agreed upon that enslaved Africans brought black eyed peas, and the tradition of prosperity associated with them, from across the sea during the Transatlantic slave trade. There's also the folk tale that black eyed peas were among the only foods available to survive on during the siege of Vicksburg in the spring of 1863. Another major event also happened in early 1863; the passing of the Emancipation Proclamation, the executive order which freed all Black slaves on January 1st, possibly further cementing the date as an important and auspicious day for the lucky black eyed pea to be consumed. 

Regardless of the exact explanation for their continued association with New Year's Day, these little beans symbolize prosperity in the new year when eaten on day 1. They swell when cooked, symbolizing growth, and also are said to represent coins. Growing up in the coastal Carolinas, I was warned by my grandparents and parents that it was of crucial importance to clean my plate and eat every black eyed pea served to me, or I wouldn't have any money in the coming year. Black eyed peas also have some tasty companions with similar symbolism. Leafy greens such as collards are also served alongside them, and are meant to represent greenbacks / paper currency, which also emerged during the Civil War period. Cornbread is another staple meant to represent gold. Pork is traditionally eaten on January 1st as well, because pigs 'root forward', sending you forward into the new year, ready to leave the struggles and habits of the old year behind. 

Some traditions vary from place to place and family to family - Hoppin' John, a fragrant combination of rice, black eyed peas, pork, and onion, can be consumed on the 1st as well. In my family, we typically ate a plate of black eyed peas, collard greens, cornbread, and pork on January 1st, and Hoppin' John was made with leftovers on the 2nd. Frugally using leftovers for Hoppin' John also ensures further luck and prosperity in the new year. It can also be used for another day's leftovers as well, which is known as Skippin' Jenny - even luckier! Bean appetite! 

Fun additional reading / sources:

- 'Foodways: Volume 7 of the New Encyclopedia of Southern Culture,' ed. John T. Edge

- 'The True Story of Traditional New Year's Lucky Foods' by Sara Bir, from Serious Eats

- Black History Month: Hoppin’ John - Her Mise En Place

Dev's Smoked & Pickled Mussels Bruschetta

By Dev, CN Manager

It's that time of year! Holiday parties and gatherings are popping up everywhere, much like endless lights and decorations over the past few weeks. It can be a struggle to find the time for any kind of significant meal or appetizer prepping among the festive zaniness pulling so many of us in multiple directions. With all of that in mind, I was struggling to think of a party dish that's not too time intensive, but will still add visual flair to a host's table... Inspiration struck when I was helping stock our selection of tinned fish and seafood; what about a tasty bruschetta with mussels...?!

These little guys are versatile and satisfying any time of year, and are a low-stress way to add a fresh, flavorful splash of color to holiday party menus. I prepped two varieties for a lovely green and red color scheme and different flavor profiles for each. 

Ingredients from the outside world:

  • Fresh garlic (3 cloves, minced)  

  • Heirloom cherry tomatoes (~ 12oz, sliced)

  • Fresh dill (a few leaves, diced)

  • Cucumber (1/2 of a standard American cucumber, diced)

  • Fresh rosemary (a few leaves)

  • Lemon (for just a bit of juice)

  • Crusty Italian bread or French baguette (~2 feet in length) 

Ingredients from our shelves: 

Preparation: 

  • Slice heirloom cherry tomatoes into halves (or quarters), and sort into two different, lidded containers by color. For this recipe, I grouped red and brown heirloom tomatoes together in one container, and yellow and orange tomatoes together in another.

  • Slice kalamata olives into halves, and mix into the red tomato container. Also add a drizzle of olive oil, a few rosemary leaves, and a handful of crumbled feta cheese into the container. Sprinkle with sea salt, and let the mixture of red/brown tomatoes, olives, rosemary, and feta marinate in the fridge so all the flavors blend together well. 

  • Now for the yellow / orange tomato mixture! In their own container, also throw in a handful of finely sliced fresh dill, a handful of diced cucumbers, and crumbled feta. Sprinkle with lemon juice and a dash of sea salt, and put aside in the fridge for marination as well. 

The above steps can also be done overnight, or an hour or two ahead of the gathering itself. The bread baking and assembly are fast and can be done directly before the event! When the time comes...

  • Pre-heat oven to 375 F. Slice the loaf of bread or baguette into small rounds, about 1/2 inch thick each, and line them on a baking tray. While the oven is preheating, add a splash of olive oil to a non-stick pan, and lightly cook minced garlic until it's fragrant and starting to turn golden brown. Then, glaze the mixture of garlic and oil onto every round of bread, and pop the whole tray of bread into the oven to bake for ~15 minutes when the oven's fully heated. 

  • Once the bread is crispy and golden, it's ready to go! I paired my olive-red/brown tomato-rosemary-feta mixture with Patagonia's smoked mussels; simply spoon a couple of mussels directly from their tin onto the warm bread, and then add the red tomato mix on top. For my dill-cucumber-yellow/orange tomato-feta mix, I chose to pair Island Creek Oyster Co.'s mussels in pickled sauce. Same process follows; the pickled sauce oysters are topped with the yellow tomato mix. Once everything is assembled, double back and add a light drizzle of balsamic vinegar and olive oil over each bruschetta slice. I also added a dusting of ground rainbow peppercorns to my own, as well, which can be done to taste. 

And that's it! Arrange on a serving platter and watch them fly. This particular recipe made around 18 bruschetta pieces, but it can be adjusted as needed to make more for a larger gathering. The contrast of smoky, deep, rich flavors with bright, tart, and sour flavors is sure to be a stand-out entry at any party in the near future, including the looming New Year's Eve!  

The 'No Makeup' Makeup Look!

By Allison, Supplies Coordinator & Green Beauty Enthusiast

Makeup can be overwhelming, especially if you’re just starting out or trying to achieve a certain aesthetic. Today, I am going to spotlight the ‘No Makeup’ Makeup Look with a step-by-step guide.

Here is how I achieved effortless radiance: (Disclaimer: I am an enthusiast, not an expert!)

  • Fill brows with brow pencil.

  • Give brows hold by combing through with a brow gel.

  • Now for the eyes, apply tinted sunscreen to the lid and set with a setting powder.

    • I applied the Josh Rosebrook Nutrient Day Cream Tinted SPF as a base to my lids and followed up with setting powder (before applying eyeshadow).

    • This will help the eyeshadow stay without creasing.

    • Again, for more coverage opt for a concealer on the lids instead of tinted moisturizer. 

  • Apply eyeshadow.

    • I used the Jane Iredale PurePressed Eyeshadow in Pink Quartz. I applied the lightest shade to the whole eye using a fluffy eyeshadow brush to brighten the eye. Then, I applied the medium shade to the outer corner of the crease to give the eye some shape and definition - make sure to blend it so that you aren’t left with harsh edges.

  • Apply mascara to finish off the eyes. 

  • Use a multi stick to apply blush.

    • I used the Axiology Multi Stick Tinted Dew in Humble to give my cheeks a bright yet natural rosiness. I applied it to the apples of my cheeks, but lots of people have a preferred blush location for their personal face shape - so apply it wherever you like!

    • Cream blush will give a natural radiance to the skin that is desired in the ‘No Makeup’ Makeup Look - powder blushes will create a more matte finish.

  • Finally! Lips - apply the same multi stick used for blush to your lips

Now let’s up the glam just a little bit! (optional)

The final elevated look!

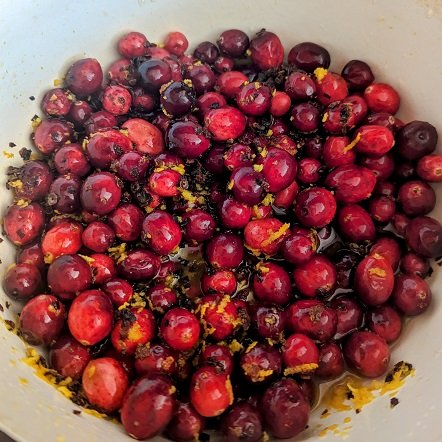
Recipe: Cranberry Rosehip Compote

By AE Strega, Supplements Buyer & Compote Enthusiast

I love making compotes. There's just something about the alchemy of fruit, sugar, and a little bit of acid pukka-pukka-ing away in a saucepan, filling the house with warmth and spice, that gives me such cozy vibes. (And, yes, let's be real: stirring a bubbling pot of something in my dimly-lit kitchen with my cat curling around my ankles makes me feel like a witch.) 

This twist on a traditional cranberry sauce is accessible enough to stand alongside your holiday table fare, but due to its spice profile is unusual enough to be a table-side staple throughout the whole fall and winter season. It's delicious slathered on crackers (maybe with a bit of cheese!), smeared into a sandwich with leftovers, as the filling for thumbprint cookies, or on top of vanilla ice cream. Bonus: it freezes well, so I like to make a double batch and keep some on hand for last-minute party invites. 

Full disclosure: I never measure anything when I'm cooking, so all quantities are approximate. Feel free to taste the sauce as you go along and tweak the flavorings according to your own preferences. 

Ingredients:

  • 1 12-ounce bag fresh cranberries 

  • 1/4 cup dried rosehips 

  • 1/4 teaspoon ground cloves 

  • 1/4 teaspoon ground cardamom

  • 1/4 teaspoon ground black pepper

  • 1/4 teaspoon salt

  • 1/2 teaspoon dried rosemary leaves (ground or just crumbled between your fingers)

  • 1 cassia cinnamon stick 

  • Juice and zest of one medium orange

  • 2/3 cup granulated sugar

  • 1/3 cup water 

Add all ingredients to a medium pot (I use a cast-iron Dutch Oven) and stir to combine. Over medium heat, cook until the cranberries begin to soften (they will release some steam and liquid while doing this as well as make a popping noise, so be warned!). 

The cranberries will lose their shape the longer they cook, so if you prefer a chunkier sauce, cook for about 15 minutes. (I prefer my sauce to have a smoother texture, so I let mine go for about 20-25 minutes, mashing up the cranberries with the flat side of a silicone spatula as I go.) The whole process usually takes about a half hour from start to finish.  

Remove the cinnamon stick and let the sauce cool. It will thicken the longer it sits in the pot. Take a deep breath: your house now smells amazing, and you have a lovely spiced cranberry sauce to eat! 

Staff Picks: Holiday Gifting Edition!

Sharing our favorite products for holiday gifting and bringing to festive gatherings!

Sarah

Baggu Stockings

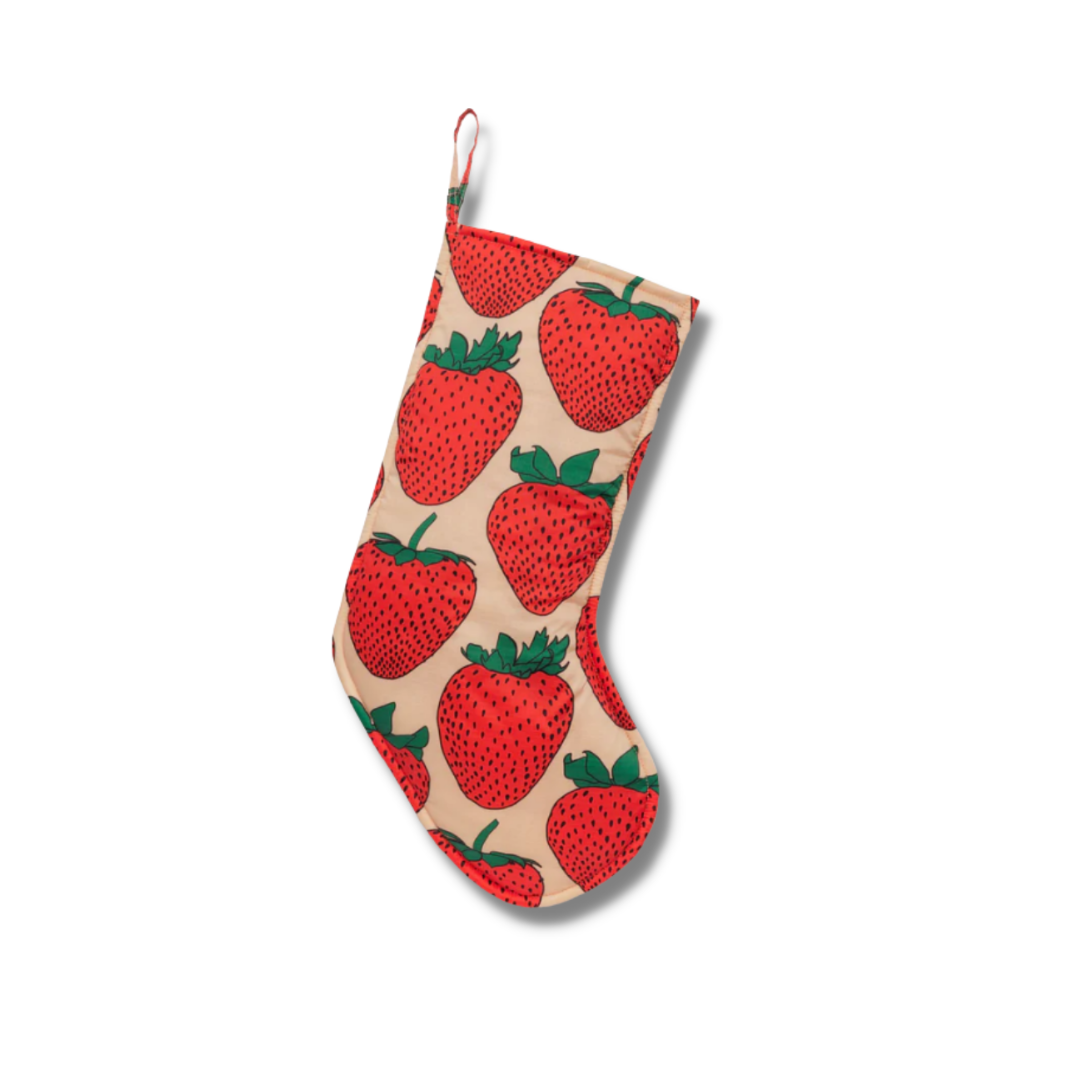
Do you have a Baggu lover in your life who already owns every possible Baggu bag?  Do simply need to own a big puffy stocking because who doesn't need a big puffy stocking?  Look no further.   We've got you covered.  The infamous strawberry print is my favorite (we have socks to match too), but with four patterns to choose from you have options!  From Stripes to Starry Fish - there's a Baggu stocking for everyone on your list.

Amber

Head & Heal CBN Oil 1:1

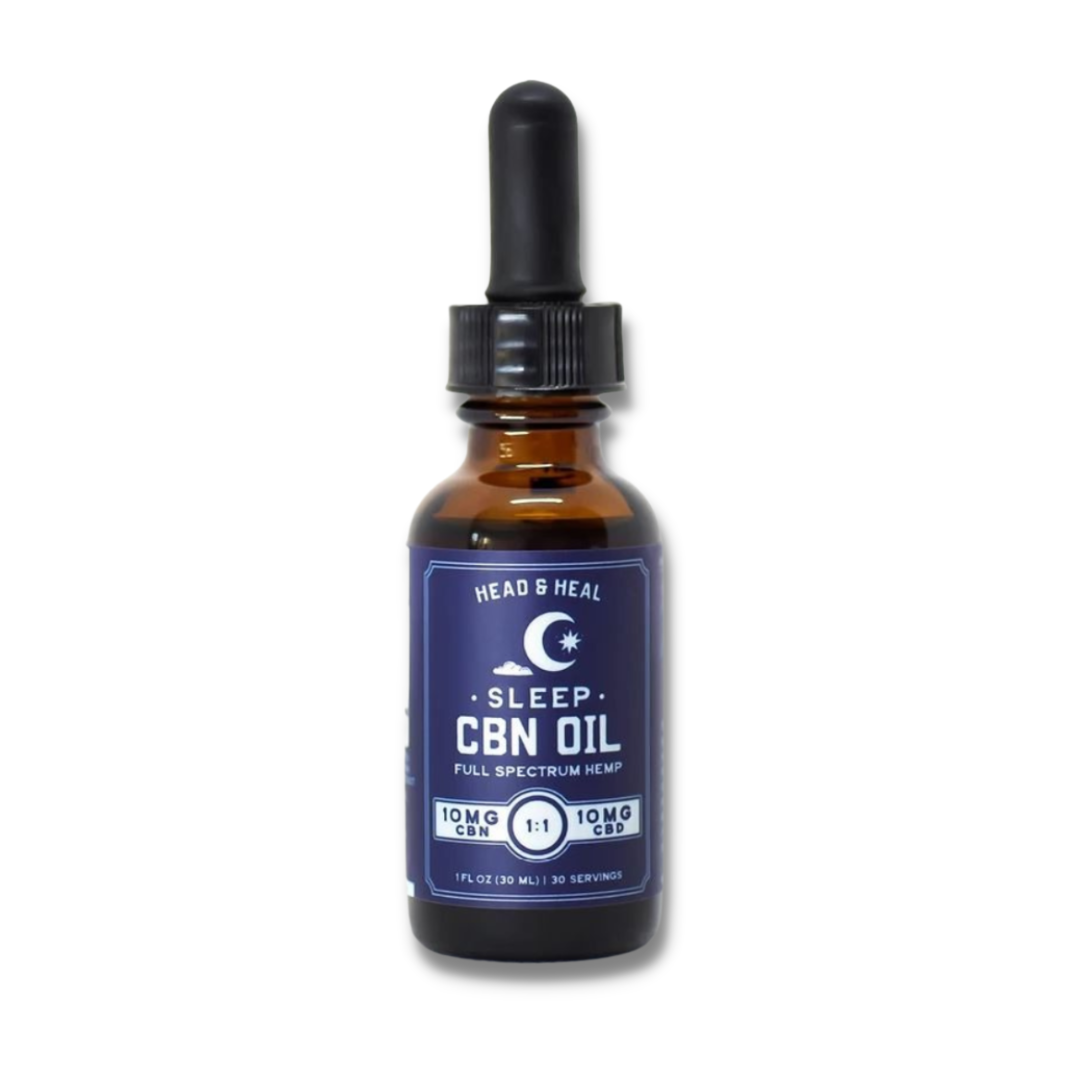
The older I get, the more I realize the value of a good night's sleep. Give the gift of rest this holiday season with Head & Heal's hemp oil that blends full-spectrum CBD oil with a relaxing boost of cannabinol (CBN). USDA-Certified organic and grown on a small farm in Cortland, New York, Head & Heal's products are made with the utmost care and attention; there's a reason they're a staff favorite at Cambridge Naturals! 

Nora

Melange Collection - Ornament, Crochet Winter Animals

They are, simply, just little guys. A perfect gift for the weird little guy appreciator in your life (we all know one - if you don't, you may be them). Whether hanging from a rearview mirror, sitting on your desk, or swinging from your handbag, these cozy crocheted friends are sure to brighten your day and emanate immaculate little guy energy.

Brenden

Fly By Jing Sichuan Chili Crisp

While I could by someone gloves, or socks or something of that nature, I believe that food is the greatest gift of all, and that's why I chose the Fly by Jing Sichuan Chili Crisp.  This hot sauce is not just an ordinary hot sauce.  It is a mild tempered, warm heat, put on anything you please hot sauce.  I add at as a condiment of sorts to rice, dumplings, and my most recent favorite, Pizza! I will be giving this as a gift because it's not just something the recipient will eat and forget about.  They will have it with them for weeks to come.

Emily

Ghia Le Spritz Lime & Salt Soda

This year I've limited my alcohol consumption even further (from the relatively minimal amount I drank before). Maybe it's getting older and wiser, or perhaps just more tired from all-the-life-things, but I've found myself even less tolerant of a morning hangover from a mere couple glasses of wine! So I'm thrilled with our increasingly excellent selection of mocktails and festive NA beverages. I'm really looking forward to holiday friend gatherings this season, and planning to bring a four-pack of Ghia Le Spritz Lime & Salt Soda to share - it's the perfect balance of crisp, bitter, tart and lightly sweet! Complex enough to feel 'adult' and supremely tasty. Crack one open and enjoy!

Shannon

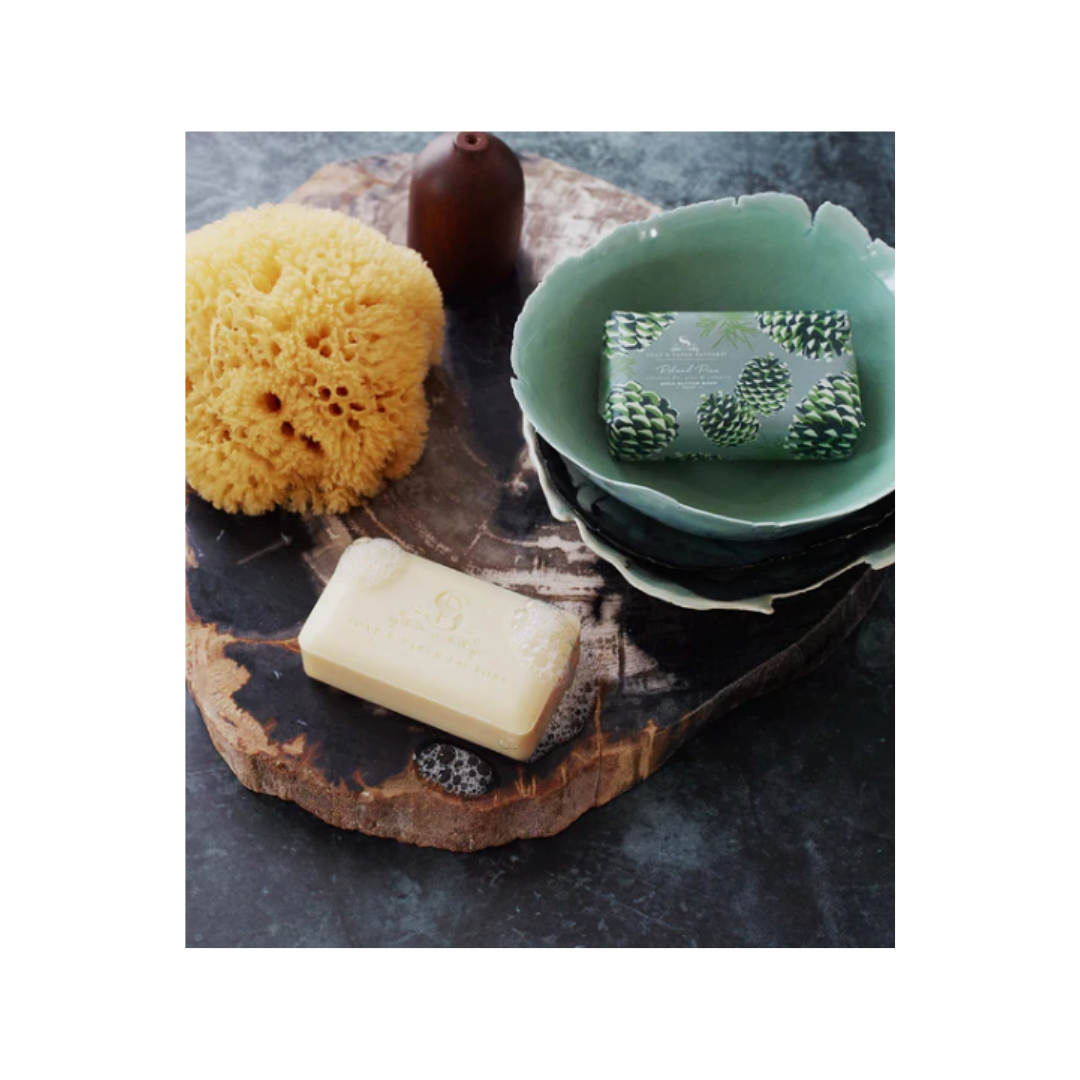
Soap & Paper Roland Pine Shea Butter Soap Bar

My partner is a big fan of the large Roland Pine candle I gave him last year. He used it all year long because it's his favorite scent! While I do plan on gifting him another candle this year (it's almost out!), I am excited to get him the Roland Pine scented soap bar! I'm sure any fan of our beloved Roland Pine candles will love using this luscious shea butter soap bar with the same scent!

Zach

Hot Dates Chocolate Covered Stuffed Dates - Spicy Sunflower Butter Flavor + Chocolate Covered Stuffed Dates - Coffee Dates Flavor

I'm always big on culinary gifts - because your family and friends deserve those things they just wouldn't know to buy themselves, right?  They've just got to try you're favorite snack/sauce/spice/drink!  For me this year, that's locally-owned-and-made Hot Dates.  Fabulously delicious dates stuffed with delectable fillings coated in top notch chocolate - these are as healthy as they are decadent.  I couldn't choose a flavor so you'll just have to try both

Caleb

Ursa Major Alpine Rich Cream

Love the holidays? Have dry skin? Wish you were walking through an alpine meadow as the sun rises and the autumn leaves in the valley glow crimson and gold? Ursa Major’s newest cream offers high quality moisture that is also light and not too oily. Perfect for dropping temps and winter winds. 

Mike

Winding Road Ornament - Yellow Chick

Life is hard; this we know. We could all use a little pal to deal with the world, and this yellow chick can be that pal! I personally keep mine hanging in my car as a reminder that no matter what happens, there's a little adorable pal to ground me. What more could you want? And, if you don't want them in your car for whatever reason, this fowl friend can hang just as easily off a tree or a little hook at home. Birds fit anywhere, and I'm personally very glad they do.

Alina:

Stainless Steel Gua Sha Tool by Mount Lai

Need a gift for the self care enthusiast or skin care curious someone in your life? Look to Mount Lai! I love using this tool for gua sha, a practice used for centuries in Traditional Chinese Medicine for promoting blood circulation, firming the skin, lymphatic drainage, and more. The shape is specifically designed to fit the curves of your face and I appreciate the cooling and antibacterial properties of stainless steel. It's also more durable than a tool made of stone (and I have dropped 1 too many jade gua sha tools for my liking). We carry Mount Lai's plant-based skin care range as well which was intentionally created to pair with their gua sha tools and is safe for all skin types! Wonderful gifts all around from this beautiful, planet conscious, Asian-Woman Owned business.

Alexandra

Mo&Co Beeswax Tapers - Bayberry

Mo&Co always offers a variety of unique handmade beeswax candles. This year, they are offering these limited edition bayberry taper candles! The historic magickal attributes of bayberry are known to draw good luck and success. On the company's website, they advise to burn the candles overnight on New Year's Eve to usher good luck into the New Year. In my eyes, this is the perfect holiday gift- a beautifully handcrafted home item with a touch of magick.

Vicki

Brush With Bamboo - Stainless Steel Tongue Cleaner

Give the gift of a super clean mouth this year, for their sake and for your own ;). This stainless steel tongue scraper will last them forever. If you've never tongue scraped before, it is amazing how much gathers on our tongue after a night's sleep. Make sure to be gently when gliding it over your tongue. This is an ancient Ayurvedic practice, that modern dentists are now recommending! Best done in the morning after oil pulling! But honestly, you don't even have to oil pull! What is oil pulling? That's for another day!

Sally

Andes Gifts - Flittens

At some point every Fall I swap out my Summer clothes for my Winter ones. I take inventory of my warm scarves, hats and mittens. This year I must have a new pair of mittens ....or Flittens ! Andes Gifts Flittens would be a perfect gift for me. These fleece lined Flittens - fingerless gloves with a mitten flap option - are fleece lined and this year we have a new beautiful color option of SageBlue and Ochre. These keep your hands warm and your fingers free, until you want to cover them with their very own mitten cap. Andes Gifts is a Fair Trade company , handmade by Aymara and Quechua artisans in the Andes Mountains. There are lots of fun color choices as well as a variety of hats and scarves to match. Happy Winter !

Daisy

Death Valley Nail Polish - Lily of the Swamp, Yellow-Bellied Sapsucker, An Electric Eel in Love & The Whir of Insects

Looking for the perfect stocking stuffer or gift to brighten someone's day? Or nails? Look no further than Death Valley Nail Polish. One of my favorite relaxing activities is painting my nails and either trying out a new color that's out of my comfort zone or even matching my nails to my favorite color scheme of the moment. Death Valley not only has a wonderful selection of colors (ranging from the essentials to more adventurous options), but their color names are equally amazing. With shades such as Lily of the Swamp, Yellow-Bellied Sapsucker, An Electric Eel in Love, and The Whir of Insects, these are sure to be a fantastic choice!

Nick

Counter Culture Rocks Glass - Gnome

There's no place like Gnome for the holdays... 
From mocktail magic to cocktail classics, Counter Culture's Garden Gnome whiskey glass is perfect for festive drinks this holiday season and beyond.

Molly

Cocokind Ceramide Barrier Serum + Travel Sized Ceramide Barrier Serum

Another great option for the skincare lovers in your life: Cocokind's Ceramide Barrier Serum. As I've learned more about taking care of my skin, I've come to realize the importance of a healthy skin barrier in preventing moisture loss and soothing irritation. This product is safe for sensitive and acne-prone skin like mine and leaves my face feeling hydrated, smooth and supple. This is one of my favorite products of the last year, I recommend it all the time and will certainly be gifting a few this holiday season. AND it comes in a mini travel size, perfect for a stocking stuffer!

Nancy

Maggie's Organics Organic Wool Mountain Hiker Socks in Heathered Purple

These are the cutest, warmest, most wonderful merino wool socks I’ve even owned. Perfect to wear for any occasion, grabbing a coffee, grocery shopping, hiking, camping or just to wear them around the house as slippers :) Super plush, softy, cushy, comfy, toasty and made from organically grown merino wool that doesn’t feel harsh on your skin. It is incredibly lightweight and delicate that doesn’t make you feel suffocating. Very breathable. This organic merino wool is produced by humanely raised sheep, and grown by skilled family farmers from southern Argentina. Always knit in the USA. If you are not into purple color, no worries at all, they also come in green and black, you are welcome! Most perfect holiday gift ever for those who suffer from cold feet, brrrrr!!!

The Mystery of Vitamin F

By Amber T, Supplements Buyer & Amateur Sleuth

I am a creature of virtually infinite curiosity. For me, there's no subject matter I don't want to know about (which probably leads to the vast scope of topics I blog about for CN). I've always had a keen interest in the history of medicine in particular (as a kid, I used to read my mother's pharmacy textbooks for fun), which dovetails nicely with my adult career as a supplements buyer for Cambridge Naturals. 

Recently, while organizing the store shelves, a question popped into my brain for which I had to ready answer. We've got Vitamins A, B, C, D, E, and K, but what happened to the letters between E and K? Was there ever a Vitamin F? What about G, H, I, and J? The absurdity of it struck me, and I knew I needed to know what the deal was with those missing letters. 

The answer, it turns out, makes surprising sense. In short, there once were these other vitamins, but repeated reclassifications gave them new identities. (And if you've ever wondered why there are so many different B vitamins, the answer to that question ties into that gap in the alphabet.) 

The early 20th century was a hotbed of activity for the field of chemistry. The (excellently-named) Polish scientist Casimir Funk is credited with coining the term 'vitamin' (from 'vital amine') around the year 1912, using it to mean nutrients essential for life. Over the next thirty years, driven in part by the destructive effects of two World Wars, the arenas of chemistry and medicine saw intense growth. Vitamins were originally classified as either fat-soluble or water-soluble, a distinction that still remains today (and in fact influences Cambridge Naturals' shelving preferences); as more vitamins were discovered, they received new letter identities corresponding roughly to the order of their discovery. But as the field of chemistry progressed, scientists realized that simple letter identities weren't quite accurate for some of their newly-discovered compounds, and began to reclassify them in categories that better fit their uses. 

Vitamin F, as it turns out, eventually became the Omega Fatty Acids (specifically 3 and 6). In 1939, Hungarian scientist Paul Gyorgy classified another substance as Vitamin H (from the German words haar und haut, meaning 'hair and skin'), though it was later renamed due to its similarity to the B vitamins. Which one, exactly? Well, if you've ever taken it,  you probably won't be surprised to learn that Vitamin H became Vitamin B7, or what we commonly call Biotin. Vitamins G and M also once existed, but were later reclassified as B vitamins (riboflavin, also called B2; and folic acid, also known as B9). Vitamin J was deemed necessary in too small of quantities to warrant the 'vitamin' label; it was renamed choline. 

And as for Vitamin I? There's actually no record of it ever existing. 

Science has always been an evolving discipline, so it stands to reason that we adjust it as we learn new things. Categories get tweaked, names adjusted, unsung discoverers given long-belated credit for their work. Part of my enduring appreciation for science is its adaptability, its willingness to change as the situation requires. 

(I feel it's appropriate to close this post by mentioning that I sit here writing this while munching Bjorn Qorn, grateful indeed for the riboflavin, niacin, and thiamine that make its nutritional yeast topping so delicious. B Vitamins are truly magic.)